What is a WDP file in PowerPoint?
If you have ever renamed a PowerPoint (PPTX) file extension to .zip and opened it up to look in the media subfolder, you might have seen files like hdphoto1.wdp in there alongside JPEGs, PNGs and more familiar media files:

So what are WDP files?
They are a highly compressed image format developed by Microsoft, called by many names: Windows Media Photo, HD Photo and also JPEG XR. These files are similar to JPEG, but will compress much smaller than equivalent JPEGs.
More importantly perhaps, why are they appearing in your PowerPoint file?
When you add "artistic effects" to any image in PowerPoint, it will convert your image to a WDP file at that point. This new WDP file becomes the ‘original version’ without any effects applied. PowerPoint then creates a PNG of your image with the effects applied.
PowerPoint uses the WDP file to allow you to revert or modify the effects at any point. Whenever you make changes to the effects, it will regenerate the PNG with the new effects added. PNG is used for backward compatibility with earlier versions of PowerPoint.
Sometimes adding effects will massively increase the size of your presentation, most likely because of a huge PNG being created.
How do you find WDP files in your presentation?
Spotting these images only using PowerPoint is tricky, and changing your presentation to a zip file to dig around in the media folder is a tiny bit cumbersome. This is where Slidewise steps in - it is a PowerPoint add-in that helps you pinpoint tricky-to-find content in your presentations.
Slidewise automatically scans your PowerPoint file and groups all the WDP files together handily in its index.

Select an individual image in PowerPoint and you will be able to see the WDP file and the auto-generated PNG associated with the image in Slidewise. You can also see at a glance how big the images are, as well as their dimensions. Hover over the PNG or WDP in Slidewise for more information.

How do you make WDP images smaller?
PNG files, particularly photographs, tend to be very large. In this example, the WDP is 699 KB and the accompanying PNG image is 3.8 MB. If further changes to the artistic effects are not required, we can significantly reduce the file size by replacing the WDP/PNG combination with a JPEG that has the effects applied. While you won't be able to modify the effects afterwards, the file size will be substantially smaller.
You can replace the image using Slidewise as follows:
1. Open Slidewise and then select the image in PowerPoint.
2. Right-click on the PNG in Slidewise and choose Export Original Image…

3. Choose where to save your file and what name to give it.
4. Open the image you saved in a photo application like Paint and then resave it as a JPEG.
5. Right-click on the image in PowerPoint again and choose Change picture > From a File...
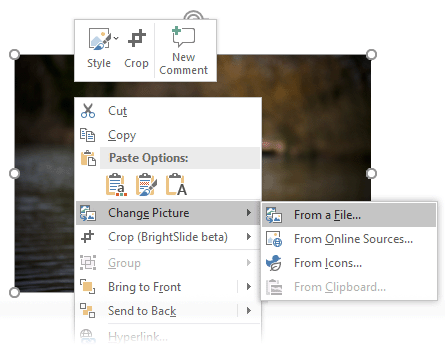
6. Select your new JPEG image and click OK.
Removing artistic effects
If you don’t want the effects, you can easily remove these. Simply click on your image, choose Picture Format > Reset Picture.
This will remove the effects, which will also automatically remove the WDP file, leaving you with a ‘clean’ PNG. However, if this is a photograph then this PNG will be far from optimal and you would still be best advised to go through the steps outlined above to replace it with a JPEG.
You may also like:
For a simple way to keep PowerPoint files small, take a look at our 5-star rated PPT Compressor.