Slidewise Features
We’ve outlined below all of the features you can find in Slidewise - click a button below to jump to that section, press ctrl+F and search for keywords that interest you, or just browse.
The Basics
Some quick tips to get you acquainted with Slidewise
Navigating Slidewise
Slidewise opens in a pane to the right of your slides. At the top of the pane is the main Slidewise navigation. Use the dropdown to switch between the 6 tools.
To the right of this is the status indicator. A tick means that Slidewise is in sync with the content in your presentation. When it is out of sync it will switch to the refresh button to indicate that you’ll need to refresh Slidewise before you can use it to make any changes.

Show in PowerPoint
One of Slidewise’s great strengths is being able to instantly take you any object in PowerPoint. It allows you to jump straight to a large image or empty placeholder, without having to try and find it by eye.
There are multiple ways to do this — the easiest is to just right-click on things and look for the Show in PowerPoint option. You can also double click or use the menu buttons at the end of each row.

Warnings and Information
Warnings are indicated by orange flags and tell you that something is wrong that needs to be addressed. Yellow dots indicate that there is more information about that content.
Hover over the row with a flag or dot and you will see a tooltip pop up with more information and sometimes links to further help.

Presentation
These features all work on the whole presentation - accessible from the Slidewise ribbon, or the presentation node in the Slidewise index.

Export Slides As
Export the selected slides as high-resolution images, a PPTX file or a PDF.
HOW: Select the slides you want to export and click the Export Slides As button on the Slidewise ribbon - or just right-click on one of the selected slides to get the Slidewise menu. Read full details on this feature.

Copy Path
This simple feature will copy the full path to your open presentation to the Clipboard.
HOW: Click the Copy Path button in the Presentation group on the Slidewise ribbon. Or if you have the Slidewise pane open, you can right-click on the Presentation node in the Fonts and Media tool.

Open File Location
Show the location of the open presentation in File Explorer.

Export All Media
Export all the images, audio and video files from this presentation to a folder of your choice.

Fonts
We created some powerful font tools so you can easily manage the fonts in your presentation to keep them in line or on brand.
List fonts
Slidewise shows you a full list of all fonts used in your presentation. You can see how many fonts are in your presentation and if they are embedded.
Open Slidewise, then expand the Fonts node to see the full list. Next to each font is a number showing how many times that font is used. Don’t forget to right-click and Show in PowerPoint to see exactly where the font is being used.

Find a font
Expand the font to see all the shapes using that font. Right-click on any shape and click Show in PowerPoint to jump straight to it. Or click the menu button on the right.

Substituted fonts
If any fonts are being substituted then Fonts will be displayed in orange, and there will be a flag to the right of it.
Expand Fonts and you will see the specific fonts that have been substituted (e.g. Inter) also flagged.

Replace fonts
If there are any fonts that you don’t want in your presentation, simply right-click and choose Replace Fonts. Using Slidewise you can replace as many fonts as you want, all at once. Either replacing with another font, or set them to use the Theme font instead.

Embed or remove fonts
Right-click on the Fonts node and you will have the option to change the font embedding to one of 3 options:
Unembed Fonts
Embed Fonts (Subset)
Embed Fonts (Full)
You will see the 2 options that are not currently in use, for example, if fonts are fully embedded, then you will see Unembed Fonts and Embed Fonts (Subset).

Media
Slidewise provides targeted tools to make working with your images and media easier.
Find large images
Images are shown largest first to make it easy to spot the biggest images (or you can use the Image Audit). When you find a large image, simply double-click on it, or right-click, or click the menu button at the end of its row to Show in PowerPoint.

Replace images
Use the replace image feature in Slidewise when you need to:
avoid changing crop settings or effects when the image is replaced
replace an image that is used multiple times
Slidewise replaces images seemlessly, and it can also change all the instances of an image used in one go — a big time saver!

Export original images
Use this when you need access to the original images from a presentation. PowerPoint normally saves a converted version of the image but using Slidewise you can get the original graphics. This is how you use it:
Find the images, or type of images you want to export in the Slidewise index.
Right-click, or click on the menu to the right hand side.
Choose Export Original Image… or Export Original Media...
Select a folder to place all of the images.
Slidewise will now extract the original images to your chosen location.
NOTE: You can also select images on the slide, right-click and choose Export Original Images from the menu. This extracts the original source images for each selected images and save them to the folder of your choice.
Find embedded Excel data
See a list of all charts and their associated data in your presentation. Jump instantly to a chart using the Show in PowerPoint feature. Open the data in Excel to edit it or check if it is sensitive.
You can remove embedded Excel data from individual charts, or from all charts at once.


Slide Masters
See slide masters, layouts and slides in a single view, making it easier to quickly organise and consolidate them. It is very helpful when combining decks.
Overview
Slidewise shows your Active slide masters and Unused slide masters in 2 separate groups.
For a master to appear in the Unused group, none of its layouts can be in use by any slides in the presentation. Normally PowerPoint would delete these automatically, but in many cases they may have been set to Preserved, which prevents them from being deleted even if they aren't in use.
There are 2 numbers alongside each slide master, indicating [Layouts in use] / [Total layouts], e.g. 3 layouts in use and 15 layouts in total would appear as 3 / 15.
Expand any layout to see which slides are using that layout.
Visit our support site for full details on how the features in the Slide masters tab work.

Consolidate Slide Masters
When you have multiple masters, Slidewise can help you to quickly rationalize them. Simply right-click on the active slide masters heading and choose Consolidate Slide Masters.
This feature automatically reassigns all the slides from master(s) you select, to use layouts from your chosen master. Slidewise will alert you if there are custom layouts that don't match so you can investigate. Any slide masters containing only unused layouts will be deleted unless they are preserved, in which case you can use the Delete unused masters feature on the Inactive Slide Masters node.

Reassign Slides
For more fine-grained control over which layouts to use for each slide, then you can use the reassign slides feature. Easily change all the slides using one layout to use another layout instead.
Just right-click on the layout your slides are currently using, click Reassign Slides and then select the new layout.

Delete Unused Masters
Unused masters and layouts can take up a lot of space, and complicate your file. See instantly which layouts and masters are not in use and delete them using Slidewise.


Colors
The Colors tool in Slidewise makes it easy to track down colors that are set directly, rather than using Theme colors. Replace colors across your presentation in seconds.
Replace colors
The Replace Colors feature in Slidewise will change how you work with color in your presentations. It can find all colors that aren't theme colors, and replace them with theme colors, or other colors in bulk. Recolor your entire presentation quickly and easily. Just right-click on a color and pick Replace Colors.

Non-theme colors
Colors that are set directly not using the theme will be listed under a non-theme colors heading. Any shapes using these colors will be listed underneath, and you can jump to them in the usual way by right-clicking and selecting Show in PowerPoint.
Non-theme colours don't update automatically if you change your theme, or if you copy slides into a presentation with a different color theme. Consider changing them to theme colors where you can.

Custom colors
If any Custom colors have been added to the presentation, for example, by hacking the XML or using Brightslide, then these will be grouped under a separate Custom color heading instead.
Like non-theme colors, this will show you all the objects that are using any custom colors, rather than being a full list of the custom colors available in your presentation.

Recent colors
Any recent colors in your presentation will appear at the bottom of the Slidewise color tool. They also appear below standard colors in the PowerPoint color picker. If you are distributing a template with brand theme colors, then you will want to remove these recent colors so that people subsequently editing the presentation won’t see them. Just right-click on the recent colors heading and choose Clear Recent Colors and they will be gone.

Theme palette
The theme colors for each slide master are listed under the corresponding master name. You can right-click on any color to copy its Hex or RGB values, or alternatively right-click on the Theme palette heading to copy the whole set of theme colors to the clipboard.
Choose to display colors in either RGB or Hex in preferences.


File Review
Use this tool to quickly check for common content and metadata quality issues, making sure you can share your presentation with confidence.
Empty placeholders
Empty placeholders can be tricky to spot by eye, and they can cause issues with screen readers. Slidewise finds them all for you automatically, and you can easily jump to them to check individually, or just delete them all in one go.

Hidden objects
Slidewise also helps you locate hidden objects that can increase file size and may contain sensitive content. These objects are collected for your review under the File Review tab, allowing you to remove unwanted content quickly and easily.

Hidden slides
Any slides that have been hidden will be listed here. Double-click to jump to any hidden slides and see what they are. Right-click on the heading to unhide or delete the slides all in one go.

Change proofing language
Slidewise now displays every proofing language used in your presentation. So you can see which languages are used and change them if needed, before sharing the file. For each language, you can view every object that uses it and quickly jump to them in PowerPoint.
To set the proofing languages in the presentation, right-click the Languages node in the tree and select "Change Language".

Comments
Any comments added to your presentation will show up here. You can export the comments to a list in Excel, to make it easier to cycle through them and make sure you address them all. As they are generally used only during authoring, it’s also a good idea to check for and remove any comments before finalising your file.

Document properties
Review and remove any sensitive or confidential information from your presentation by checking and deleting both document and custom properties. These properties can be found and deleted independently under the File Review tab.

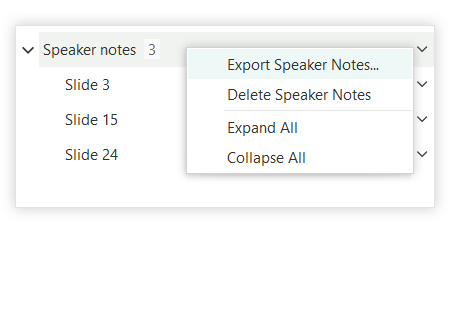
Speaker notes
All of the slides that contain speaker notes will be listed under this heading. Double-click on a slide to jump to it and review the notes. Right-click on the heading to export or delete the notes.

Slide Selection
This tool has two tables that let you select individual or multiple slides based on either their Transitions, or their Masters/Layouts. Sort, filter or search the table and select any slides you want to edit and change them in bulk.
Transitions
See at a glance the transitions set on every slide. Click the header to sort, or the filter icon to show only matching slides.
Select the slides you want to change in the list and the same slides will be selected in PowerPoint. You can then edit them using the Transitions ribbon to change the transition settings for all of the selected slides at once.

Masters / Layouts
Use the filter to only show slides with particular layouts, masters or visibility. Select slides in the list to select the same slides in PowerPoint.
You can then right click on one of the selected slides in the thumbnail list to access any built-in features. Delete the slides, copy them, or export them using the Export Slides feature in Slidewise.


Image Audit
The Image Audit automatically finds images that are problematic and groups them together so that you can quickly fix them.
Images too big
These images are larger than necessary, which increases the size of your presentation. We recommend compressing these images to reduce file size.
Low compression images
These images are saved using very high quality, or in an inefficient format e.g. a photograph saved as a PNG. We recommend compressing these images to reduce file size.
Cropped images
These images have been cropped but the cropped areas are still in the file, just hidden. To avoid any content being distributed with your presentation, you can quickly pass through and check any cropped portions of images to ensure they don’t contain anything sensitive or incorrect.
You can also remove all the cropped areas of images, either individually or all at once using the compress pictures feature. Compress and choose 'Delete cropped areas of pictures' to reduce file size.
Auto-generated images
These images were created automatically by PowerPoint for backward compatibility. They cannot be directly edited, however if they are too big, you do have options:
SVGs
PowerPoint automatically creates PNG versions of any SVGs to show in PowerPoint 2013 or earlier. Read our guide on how to compress these images.
WDPs
When you add effects to images, PowerPoint creates a WDP file (the original) and a PNG version (with effects); changes to the effects trigger PowerPoint to recreate the PNG from the WDP. Read our guide on how to compress WDP images.
Images that are too small
These images are too small. Some images may appear blurry, grainy or otherwise visually poor. We recommend checking each image to check the quality and replace if needed.
Distorted images
These images have been scaled more in one dimension than the other, creating distorted images. We recommend that you check each image visually to ensure it’s not problematic and replace if needed.
Broken/corrupted images
This category will highlight any images that are corrupted and might need to be replaced. Check any images to see if it is visibly corrupted and replace as needed.