6 ways unwanted fonts get into Word
Whether auditing a document for redundant fonts or cleaning them out of a received file, understanding how they enter your project is key. Below are the six most common culprits, which you can use to track down fonts in existing projects or create cleaner files from the start.
If you just need to quickly clean up a document and remove some fonts, then I recommend also checking out our article on how to list and replace fonts in Word documents.
The problem with unwanted fonts
When fonts are NOT embedded, then extra, unwanted fonts can cause display issues for anybody who doesn’t have the particular fonts installed. This is because Word will silently replace any fonts you don’t have available, causing the text to render differently than the author will have intended. If you’re worried about this particular issue, read our blog on why fonts get replaced and how to identify substituted fonts in Word.
If fonts are embedded, then the unwanted fonts can unintentionally cause large file sizes, like in this example:
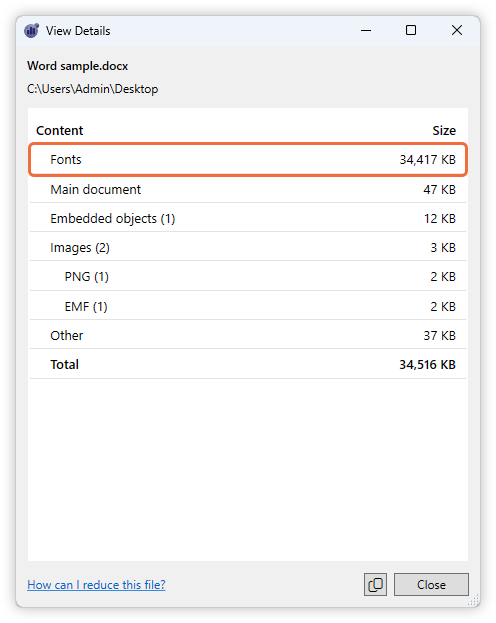
View Details report showing a Word file size breakdown
The large file size in this example is caused by a single font that is almost 34 MB! This summary view is from our file compressor NXPowerLite Desktop. Download a free trial if you want to try it yourself.
6 common ways rogue fonts enter Word files
Unused styles
Complex script fonts
Hidden text
Invisible characters
Tracked changes
Number and bullet list styles
Unused styles
Any fonts defined in Paragraph and Character Styles are considered by Word to be “used” by the document even if the style is not currently applied to any text. This can dramatically inflate file sizes if fonts are embedded.
In addition to styles that you explicitly create, they can also be pasted in by accident. When text using a style is copied and pasted from another document, Word brings the custom style from the source document with the text. Even if the user immediately deletes the pasted text or manually changes its font, the pasted style remains saved in the document.
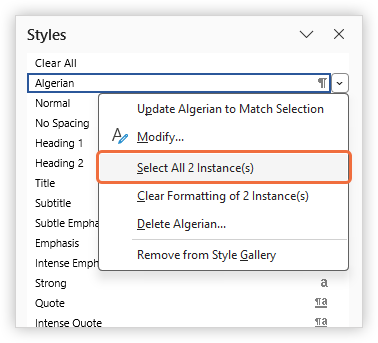
There is currently no quick way to see a list of all styles that are not used in your document. To find out which styles are used, you need to check each style individually. To do this, open the Styles pane by pressing Alt + Ctrl + Shift + S. Click the menu button alongside each style name, and Word will offer to select all of the text instances in your document that are using the style. See this example for the Algerian style, where there are 2 instances.
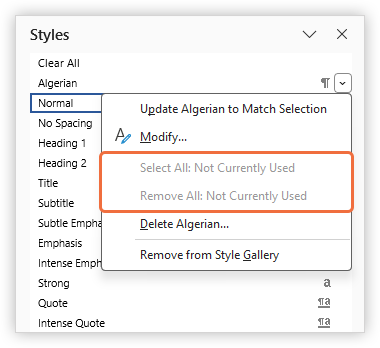
If the options to select the instances of text using a style are disabled (like in this example), this style is not used in the document, so you can safely delete it, to remove any fonts it references.
Complex script fonts
Complex script fonts are those that support specialized rules such as right-to-left alignment, character joining and stacking. Examples include Arabic, Urdu or Thai.
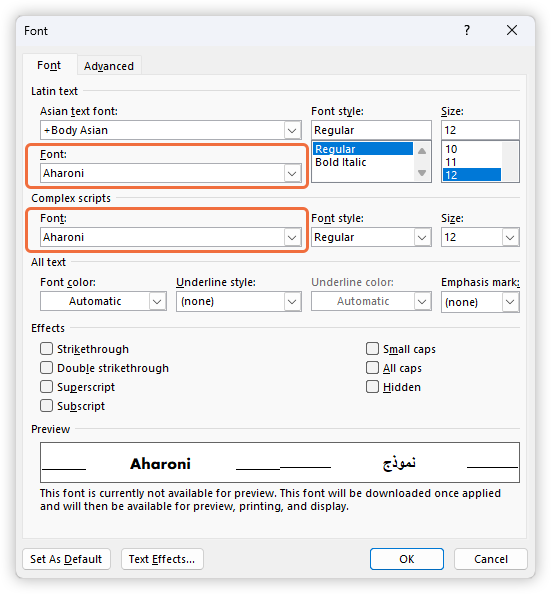
Fonts for complex scripts are assigned automatically when you choose a font that supports both Latin and complex scripts, or when pasting content that requires complex script rendering. Selecting a font capable of handling both script types—for instance, Aharoni—causes it to be automatically set for both by default (highlighted below).
This happens regardless of whether you have a complex script language installed or not. In order to see the font in your UI, though, you will need to install at least one complex script language. Otherwise, your font dialog will look like this (No complex script options):
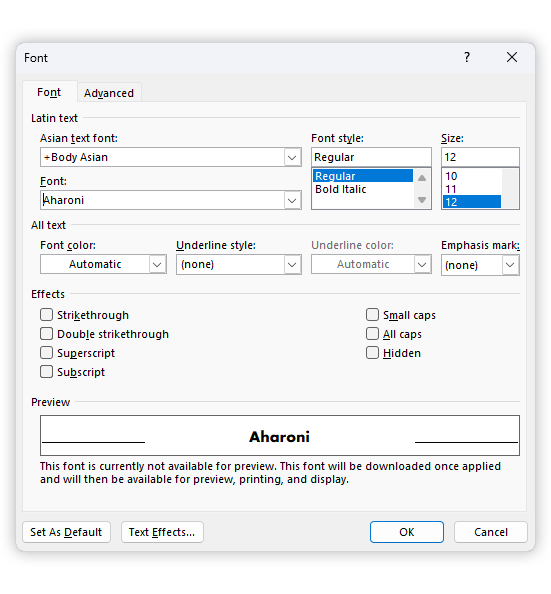
The problem is triggered if you later change to a font that does not support complex scripts. When this happens the Latin font will change, but the old font remains specified for complex scripts. As an example, if we change Aharoni to Arial Nova (orange outline), you can see it leaves the complex scripts font unchanged.
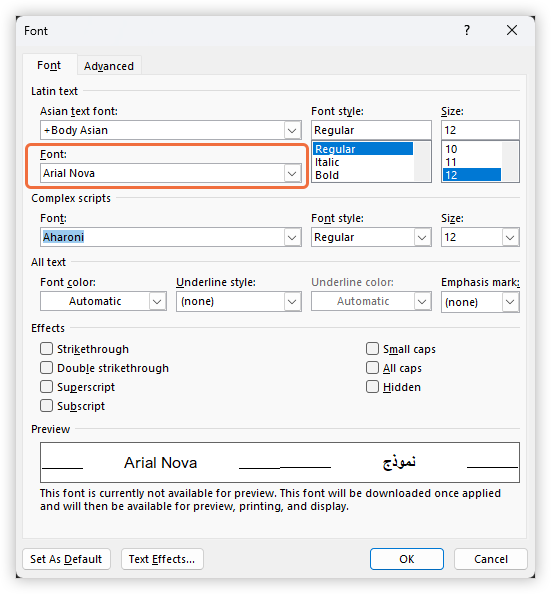
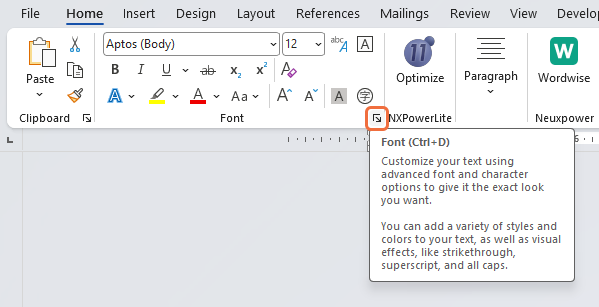
The font dropdown in Word only shows you the main font used in a shape, or the font used for the selected part of the text. To see and edit the fonts specified to be used for additional scripts, you need to select the text and then press Ctrl + D, or click the More button (orange outline) in the bottom right corner of the Font section on the Ribbon. This opens the detailed Font dialog above that shows you which fonts are specified for each script.
Hidden Text
Text can be marked as hidden in the Font dialog box. If this text happens to include a font you want to track down, it can be hard to spot.
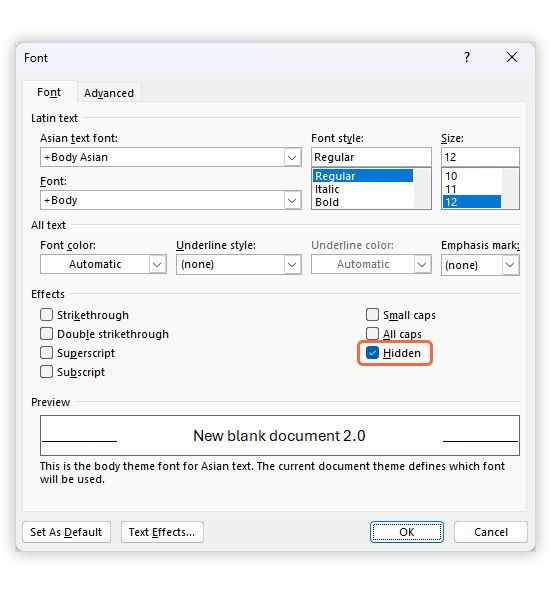
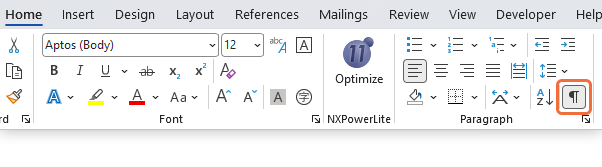
Clicking the “Show Paragraph Marks” button on the Ribbon will display any hidden text.
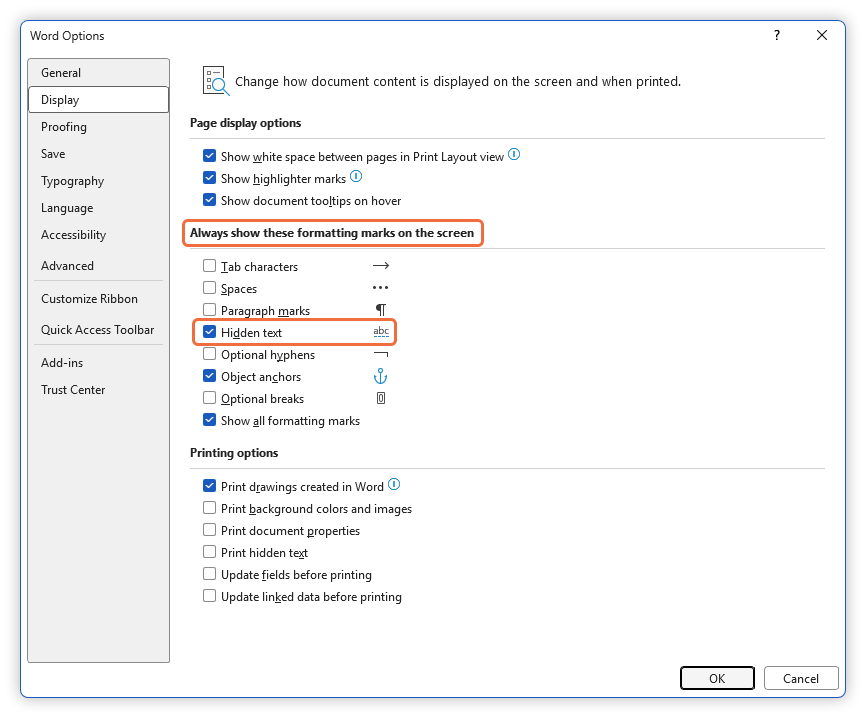
Alternatively, you can go into the backstage (File > Options > Display) and check the box alongside “Hidden text”, which will ensure it is always visible.
Invisible Characters
Formatting, including fonts, can be attached to all kinds of small and mostly invisible characters, including spaces, Pilcrows, carriage returns, soft hyphens and tabs. If you know which font you are looking for, you can of course use the Advanced Find feature in Word. We describe here how to list fonts in Word without additional software.
However, this is where a tool like Wordwise will really shine. It brings all of the information on what fonts are in your document to your fingertips. It then allows you to see everywhere that font is used, and makes it simple to replace them with a few clicks. To get early access to the software just join the waitlist on the Wordwise product page.
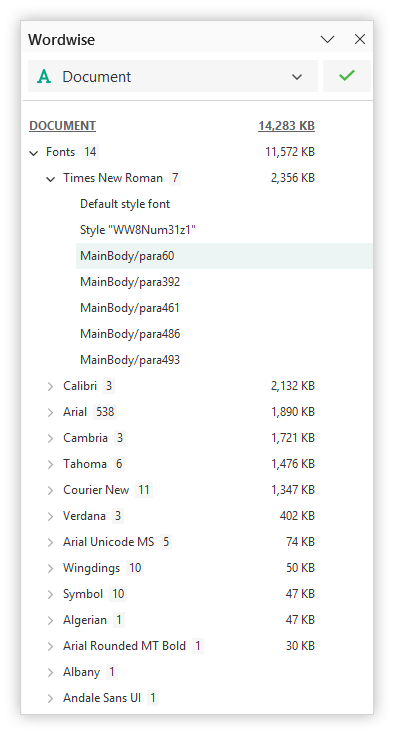
Wordwise add-in showing a list of fonts and where they are used in the document.
Tracked Changes
When documents go through legal review or multiple collaborative drafts, "ghost" fonts can creep in and hide just out of sight in not yet accepted changes. If you have Track Changes on, but view changes off, then any text that was edited or deleted will be hidden from view. As an example, if a reviewer changes a paragraph from Arial to Times New Roman, the original Arial text isn't actually gone—it's just marked as "deleted" and hidden from view.
Until those tracked changes are officially “Accepted” or “Rejected”, Word has to keep the deleted text—and its associated font—fully loaded in the file's metadata. If you need to keep a history of edits, you will need to accept changes selectively or finish the review process before you can fully purge the 'ghost' fonts.
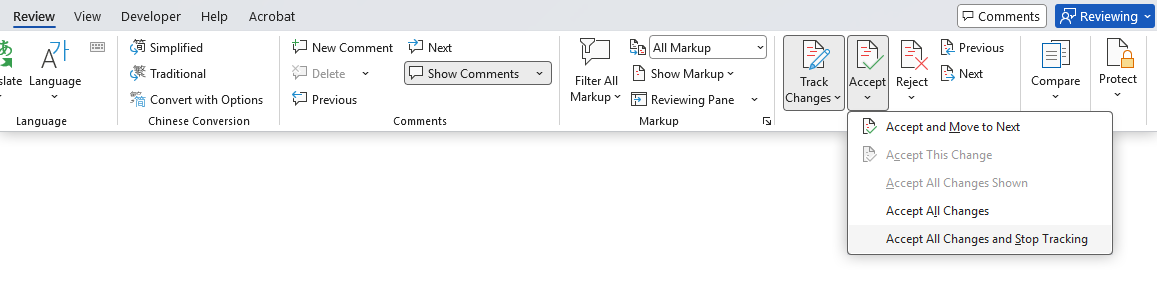
Otherwise, you can quickly fix this by just accepting all the changes, which you can do from the Review tab. Click Accept (drop the arrow down) > Accept all changes and stop tracking.
Number and bullet list styles
Creating a list style in a document seems to embed it permanently. Although you can purge all visual occurrences from your text and clear it from the Styles explorer, the style definition persists within the document's underlying XML. So, if you embed fonts later on, Word continues to include fonts associated with these deleted list styles alongside your active document fonts.
Even if you delete the style from your list library, font references persist in the underlying XML markup, causing the fonts to remain embedded.
We haven’t found a way through Word’s UI to fully remove fonts from list styles after they have been created. Copying your material into a fresh, "clean" file is the sole workaround we have found. However, we intend to fix this with Wordwise, so don’t forget to sign up for the beta version to give it a try.
Preventing unwanted fonts from sneaking into your documents can be difficult, because adding them is often much easier than removing them. This tricky issue is core to the creation of Wordwise. Our Word add-in is designed to highlight unwanted content as soon as it enters your file and provide straightforward solutions to resolve it.
When it comes to font management, Wordwise finds every instance where a font is referenced and displays them in a tree view for easy navigation. From this font overview, you can quickly swap out specific fonts or replace them all at once to keep your document clean and consistent.
Join the Wordwise beta list today to get early access to our new add-in.